
First of all, let‘s look at the big pluses of vector images:
- Crisp image, regardless of resolution or pixel ratio
- Smaller file size (for the most part)
Of course vector formats are only suitable for non-bitmap content, e. g. icons.
When I got into iOS development with Xcode I started to export all images I
needed in different sizes: Apple recommends 1x, 2x and 3x factors. Of course
that immediately became tedious and made me look for alternatives. Luckily,
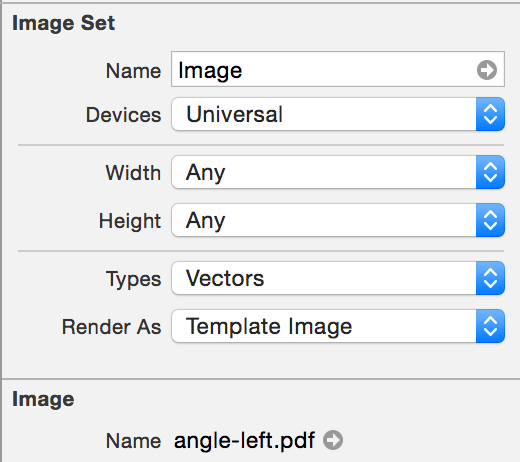
Xcode 6.x supports vector assets – you just need an .xcassets file in your
project for storing your images. In there, you can declare image sets to be
“Vectors”.
After doing that the image set can be used throughout Xcode like any other
image. But there’s another advantage: When it comes to icons a typical use
case is to embed the same icon in multiple scenarios. Like in web development with
HTML, CSS and SVG we can colorize icon strokes in Xcode as well, so there’s no
need to store multiple color variants of your icons in your Images.xcassets.
You just need to set “Render as” to “Template image”.
Then, your freshly added vector images are colorized in the tint color set in their properties in Interface Builder. If you can’t use Interface Builder and want to set the properties programmatically (in Swift):
myImageView.image = myImageView.image!.imageWithRenderingMode(UIImageRenderingMode.AlwaysTemplate)
myImageView.tintColor = UIColor.whiteColor()
As often, a lot of typical problems can be solved directly in Xcode using just properties and Interface Builder — sometimes the settings are just buried in Xcode’s panels and hard to find.