
Step 1: Configure Metamask and obtain test Ether
In order to play around with any Ethereum smart contracts, it is useful to select a test network where Ether is worthless, i.e. not traded at exchanges. Since the official Ethereum/WebAssembly test network is no longer available, Oasis Ethereum is a suitable replacement. It is currently in developer preview and offers a faucet to obtain free Ether.
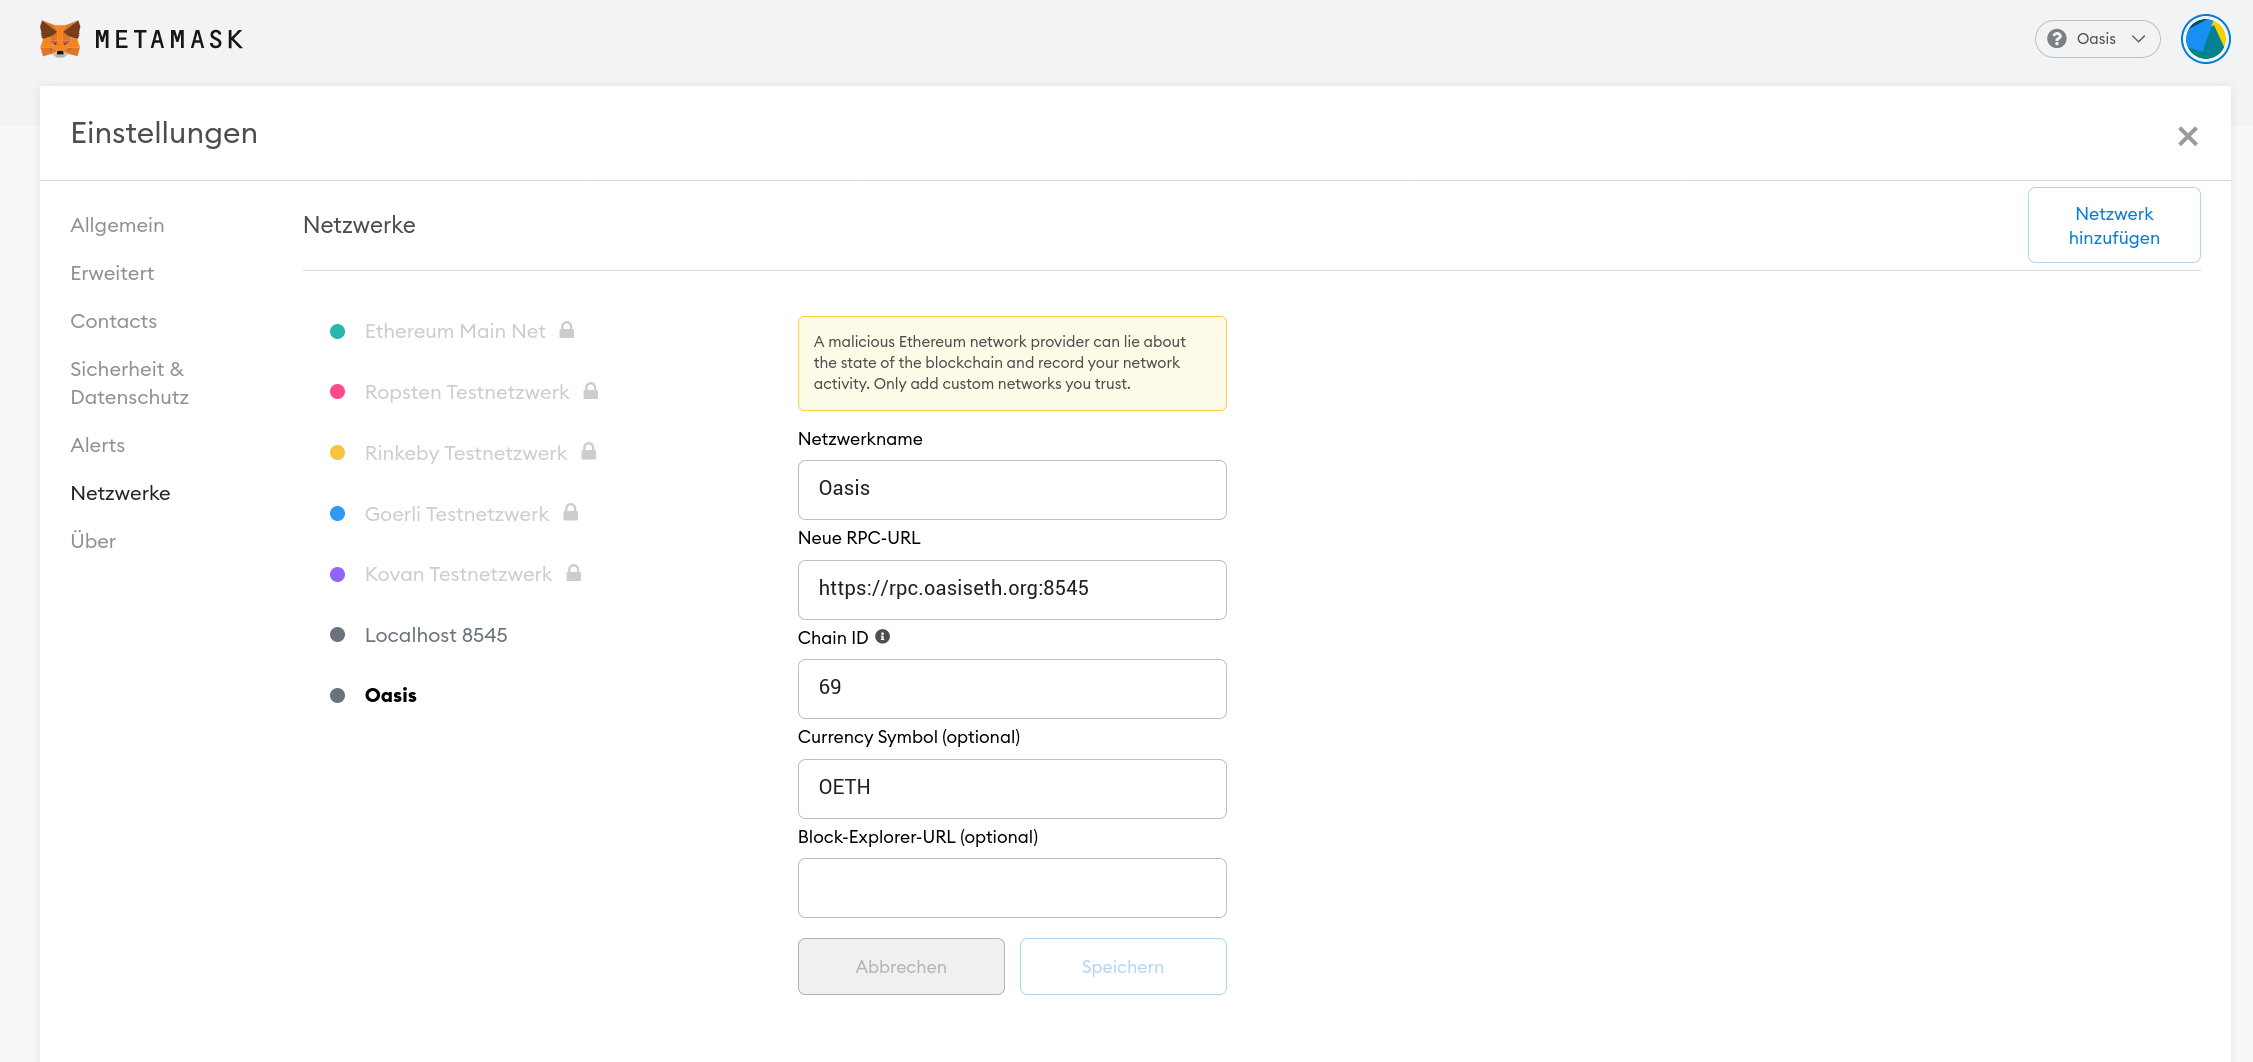
First of all, add a new network to Metamask.
The RPC URL for Oasis is https://rpc.oasiseth.org:8545, the chain ID is 69.
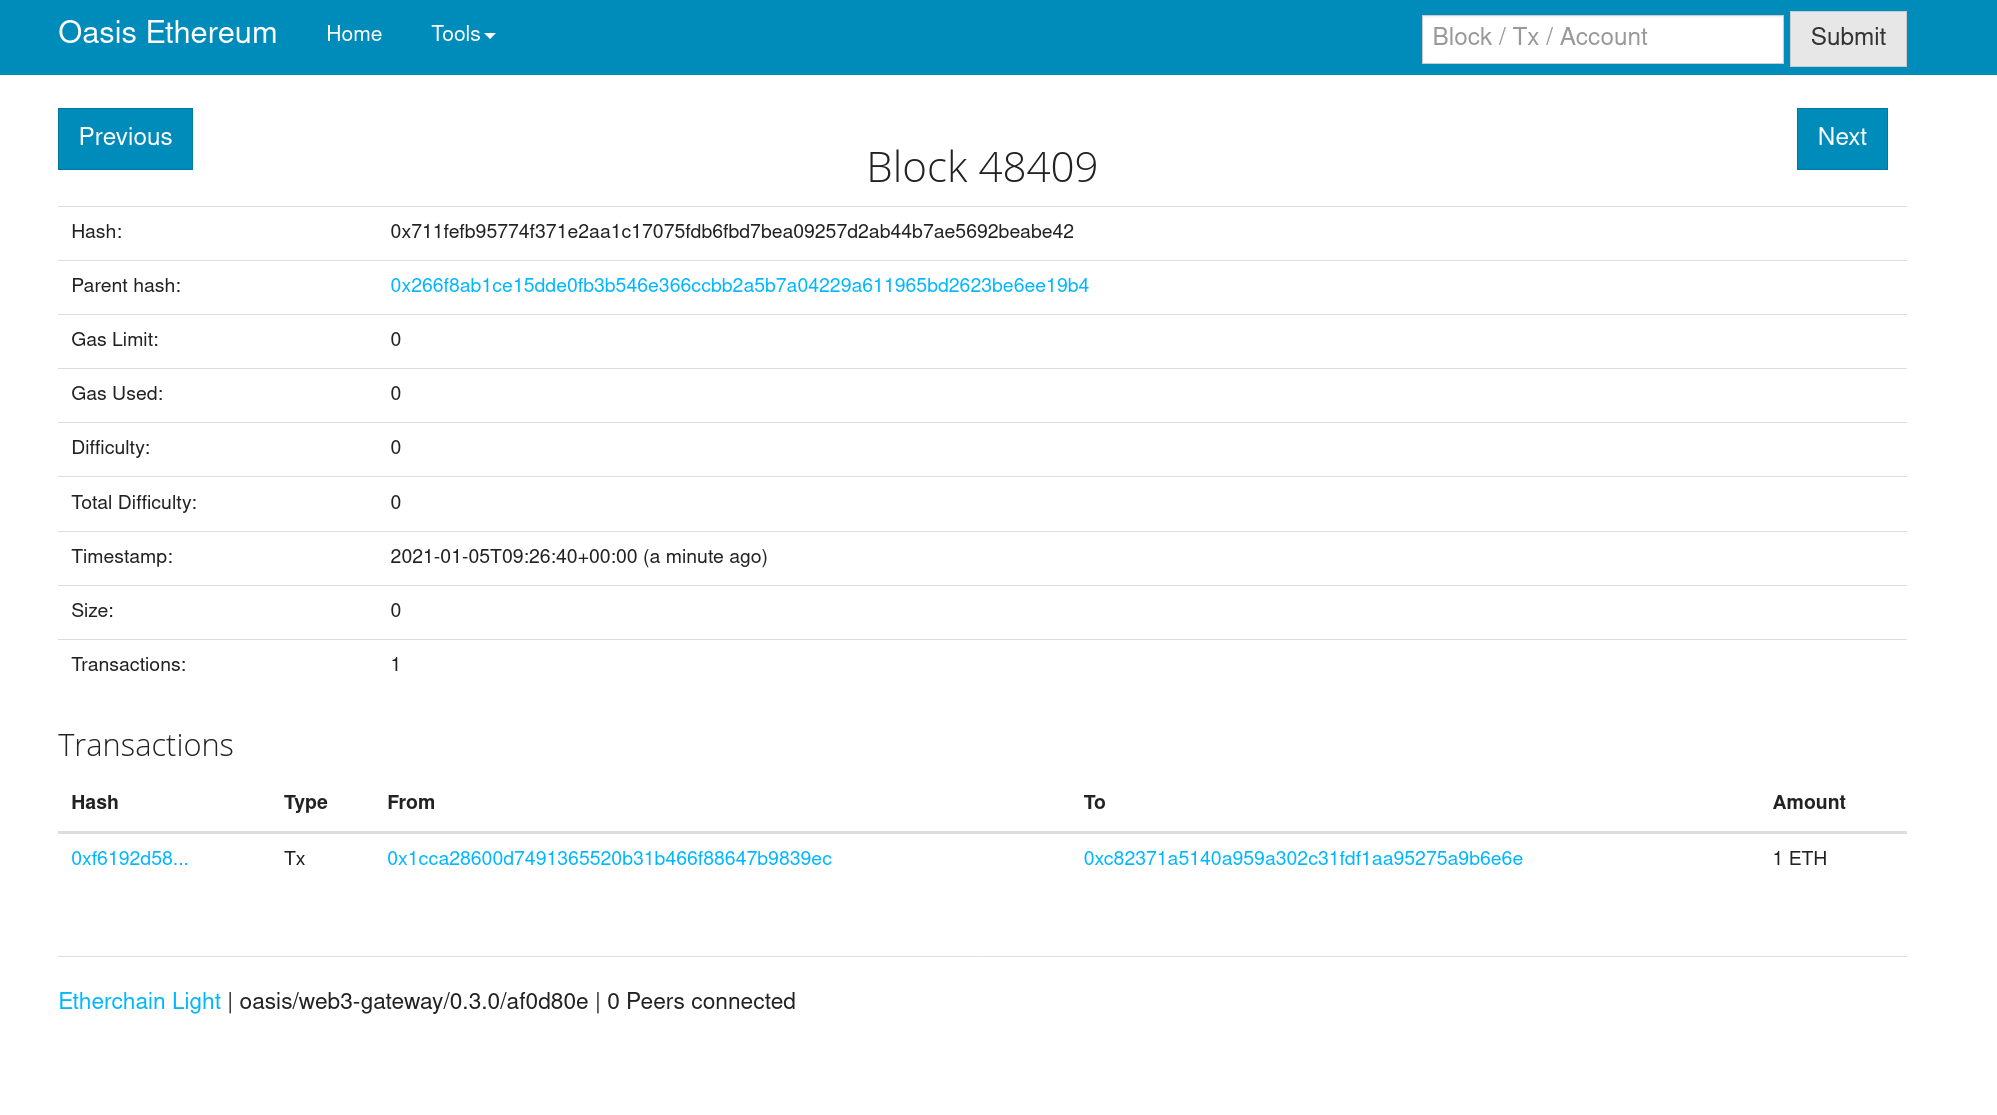
There is also a block explorer available.
Your Metamask screen should look like this:
Now, navigate to the Faucet page and enter your Ethereum address. I highly recommend creating a fresh address for any experiments. In Metamask, you can do that by clicking on the account avatar in the top-right corner and selecting “create account”.
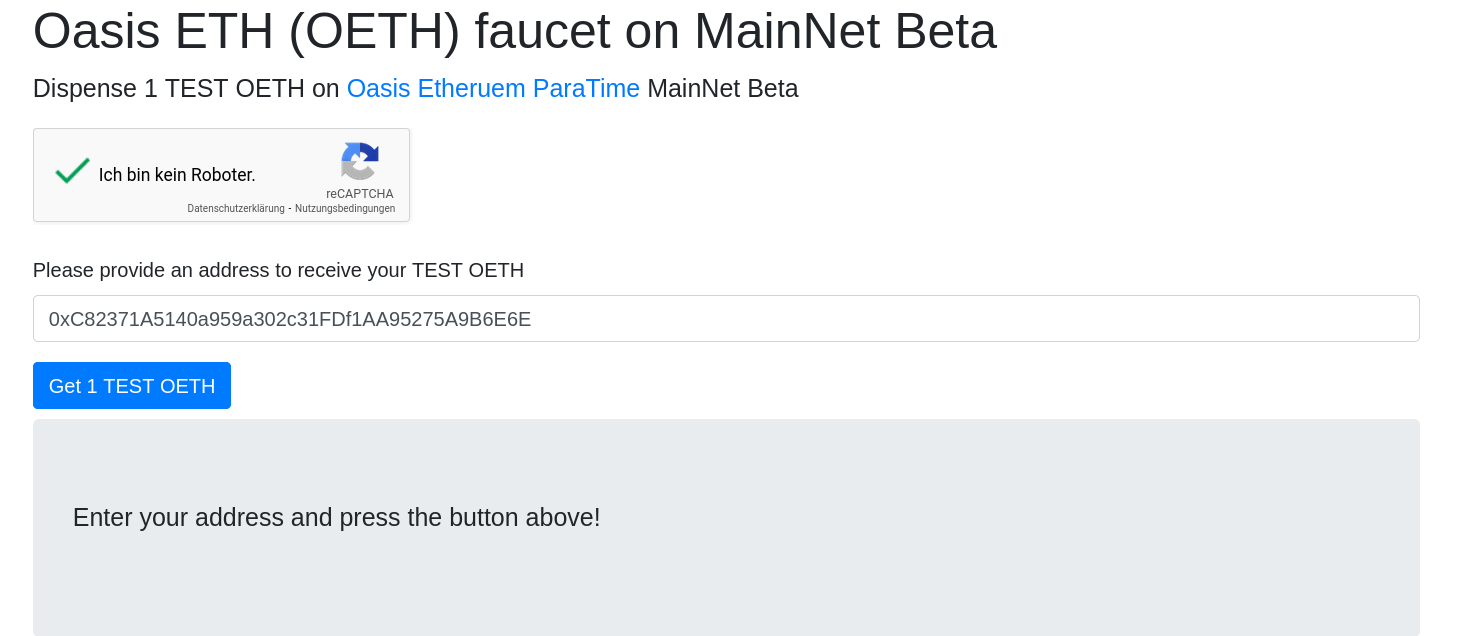
After a while, the Ether should appear in your account. You can also check out the list of recent transactions in the block explorer (below the table of recent blocks). It should only take a few seconds before a transaction sending you 1 Ether is confirmed by the network.
Now you’re good to go!
Step 2: Build & deploy a contract
The Oasis documentation comes with a few examples of smart contracts written in Solidity that can be compiled to WebAssembly.
For this tutorial, I’m going to assume that you already have a compiled WebAssembly artifact.
If you just want to play around, the ERC-20 example is suitable and comes with both the Solidity and the resulting WebAssembly file.
For the next step, you need to have Node.js installed together with the web3 package.
You can install that package using npm install -g web3.
Now we’re ready to deploy. Fire up a Node console:
$ node
> const web3 = require("web3");
> const w3 = new web3();
> w3.setProvider(new web3.providers.HttpProvider("https://rpc.oasiseth.org:8545"));
> await w3.eth.net.isListening();
We instantiate a fresh web3 instance and let it connect to the Oasis RPC server.
In principle, we could run our own client locally, but the above is easier (and also what Metamask does).
Now, we need to read the compiled contract:
> const { readFileSync } = require("fs");
> const data = readFileSync("erc20.hex", { encoding: "utf8" });
Note that data should contain a hex-encoded string without a newline at the end:
> data
'0061736d01000000...65'
All WebAssembly binary artifacts start with the hex string 0061736d01.
Before we can deploy, we need to unlock an account in web3.
Normally this would be done automatically by Metamask, but we’re not running in a browser context here, so we’ll have to do it manually.
Go to your account details in Metamask and click on “export private key”.
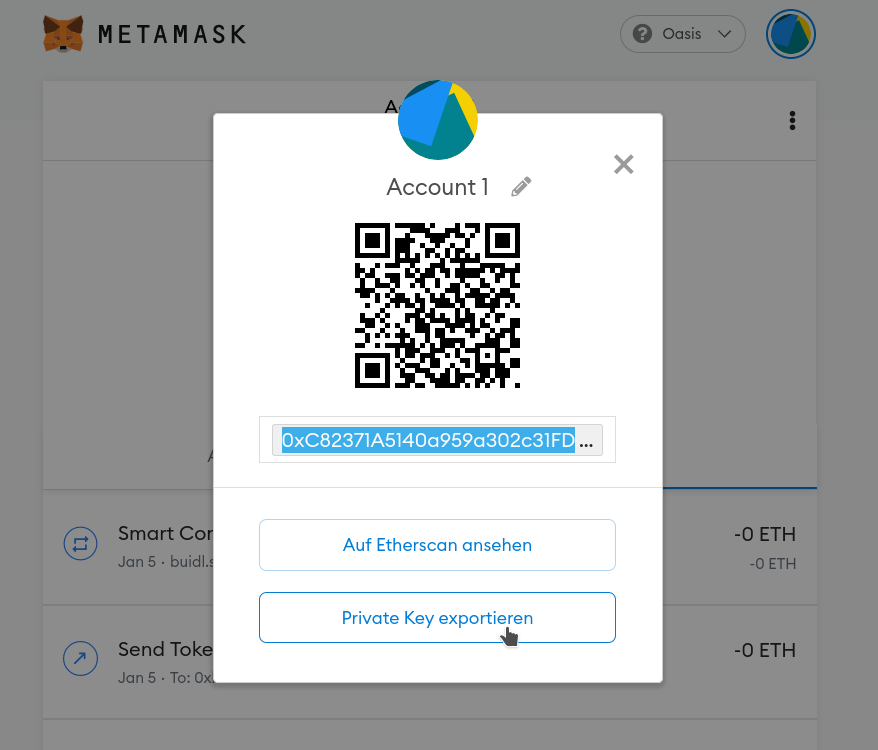
The private key should also be a string of hex digits.
Don’t tell anyone about your private key!
You should keep it safe.
Register it in web3:
> w3.eth.accounts.wallet.add("34...50");Finally, we can deploy the contract:
> const receipt = await w3.eth.sendTransaction({ from: 0, data: data, gas: 10000000 });This will take a while and just print undefined.
Check out the block explorer and it should show a transaction that creates a new contract.
You can also print the details in the Node console:
> receipt
{ blockHash:
   '0xaba215c050880c0a5a2360a9d8e45c62bb47b955162f454d586f8bc5976c1533',
  blockNumber: 48421,
  contractAddress: '0xad1c3896b09F86906030654F6e92D61bf0D24293',
  cumulativeGasUsed: 467152,
  gasUsed: 467152,
  logs: [],
  logsBloom:
   '0x00000000000000000000000000000000000000000000000000000000000000000000000000000000000000000000000000000000000000000000000000000000000000000000000000000000000000000000000000000000000000000000000000000000000000000000000000000000000000000000000000000000000000000000000000000000000000000000000000000000000000000000000000000000000000000000000000000000000000000000000000000000000000000000000000000000000000000000000000000000000000000000000000000000000000000000000000000000000000000000000000000000000000000000000000000000',
  root: null,
  status: true,
  transactionHash:
   '0x6b2e08d73636a06ef55acedf9206cc2a50305e20c514e034147fa89f527d2bfa',
  transactionIndex: 0 }
Congrats, your contract has been deployed!
Step 3: Talk to the contract
This is where it gets a little difficult.
Usually, contract development can be done with e.g. the Remix IDE, but it doesn’t understand WebAssembly.
Consequently, it can only trigger methods that are executed on the blockchain.
On the other hand, it’ll throw errors for view methods, because it can’t interpret them.
If you have the ABI for your Solidity code (e.g. for the ERC-20 contract), you can interact with it in Node.
> let ctr = new w3.eth.Contract(abi, receipt.contractAddress);
> await ctr.methods.balanceOf("0xC82371A5140a959a302c31FDf1AA95275A9B6E6E").call();
If you call balanceOf with the address that you used to create the contract (not the secret key), it should print 1000, since that is the initial amount of tokens created for you in the contract.
You can also try compiling the same Solidity code in Remix and then adding the contract manually.
It should be possible to call the transfer method from Remix to transfer tokens from account to another.
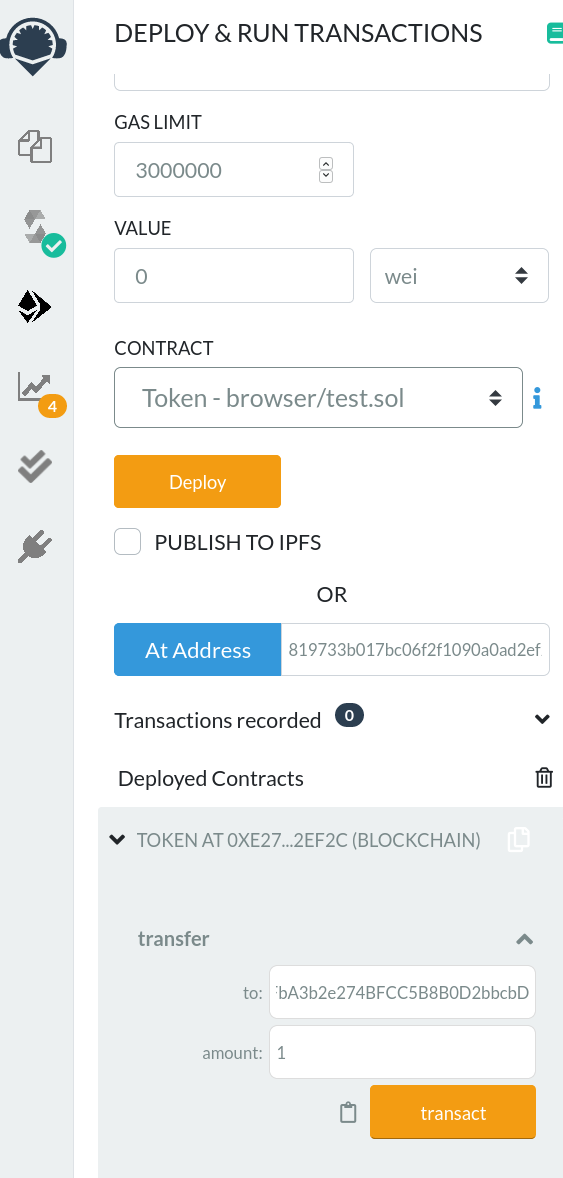
In my case, I transferred 1 token to another address, which means that querying the balance again will print 999:
> await ctr.methods.balanceOf("0xC82371A5140a959a302c31FDf1AA95275A9B6E6E").call();
'999'
That’s it! The development of EWASM is ongoing, so some things might break. However, the possiblities are exciting, since it is theoretically possible to run the same WebAssembly code in the browser and on Ethereum.